This page provides quick introduction to using Flash Synchron.
To try Flash Synchro in few easy steps:
Download Flash Synchron from the web and extract the zip file to any folder (you can delete it after the installation).
Run
the SETUP (.EXE) file to install and start Flash Synchron. It will be
installed to your user profile only and started immediately.
If
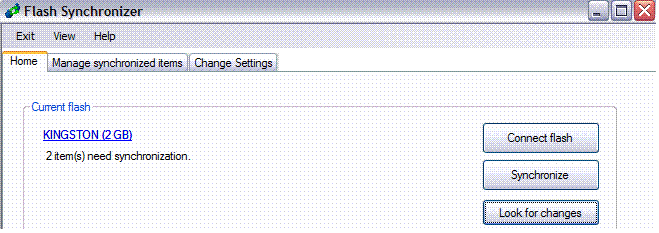
the program does not start, start it from the Start menu. Main program window
appears:

Plug your flash drive into the computer
If the file was not configured with Flash Synchron yet, nothing will happen. If this case click on the Manage synchronized items tab.
Make sure in the box your flash drive is selected. Then click the Allow synchronization with this flash button.
Next
you will be asked whether you want to synchronize the flash drive with
this computer. In most cases
you will. But note that you can have different sets of folders and files
on different computers synchronized with this flash drive and you also do
not have to synchronize the drive with a certain computer
at all.
If you select
YES, name of your computer will appear in the list below. Now you are
ready to select folders and files which should be synchronized.
Click on the computer name and then on the Add folder or Add file button.
First,
you are asked to select folder or file on this computer which will be
synchronized ("PC-folder"). Folder selection is shown in the
example picture below.

Then you will select folder on the flash drive with which your "PC folder" should be synchronized.

Please note: The folder you select here will be
directly used for synchronization. There WILL NOT BE a subfolder created with
the same name as the "PC-folder". For example if you select C:\myfolder
on your computer and then E:\anyfolder on the flash
drive, the files from "myfolder" will appear directly in the "anyfolder"
folder on the flash drive. Subfolder E:\anyfolder\myfolder
will not be automatically created.
If you wish, you may create such folder in the folder selection window using the built-in
Create
new folder button.
The folder will appear in the list under your computer's name.

You can add as many folders and files as you wish. You can also repeat this procedure on different computers and, for example, synchronize files from folders located in different places on two different computers info one folder on your flash drive. The list of synchronized items may then look like this (note the "Display all computers..." box checked).

Now return to the Home tab and click Connect Flash button. Number of files which need synchronization will be displayed.

Click the Synchronize button to synchronize the files. See Synchronization rules topic in the Flash Synchron help for more information on the rules Flash Synchron uses to decide which files to replace or keep. After successful synchronization, there should be 0 items needing synchronization.

When you are about to remove the flash drive, Flash Synchron will ask whether you wish to synchronize your files.

Flash Synchron will run in the background and monitor for arriving flash drives. You can close it or display the main window again by clicking the icon in system notification area with right mouse button.
![]()
When
you insert your flash drive next time, Flash Securer will detect it and
display information about synchronized files.